

How To Repair Wall Plaster
Plaster gives a shine finish to walls and ceilings and is difficult-wearing too.Yet, over fourth dimension, damage tin inevitably occur as furniture gets moved effectually, walls knocked and the similar.
In general, damage to traditionally plastered walls comes in the course of cracks, missing chunks or damaged corners, while plasterboard harm is normally limited to holes. Skimmed plasterboard tin too develop hairline cracks.
One of the most common causes of damage occurs when stripping off wallpaper. You lot can stop upwards with a wall that looks like its been peppered with bullets. In this case, information technology volition be better to call in a professional plasterer skim over the whole wall — unless yous are planning on papering over it.
You can expect to pay effectually £12/m², more if you start adding other pocket-size plaster repairs you have virtually your house. For these modest jobs yous will be better off going down the DIY route — we show you how information technology'due south washed.
Methods of Plastering
Houses built upwards until the terminate of World War Ii are likely to feature lath and plaster non-load-bearing/dividing interior walls and ceilings. The laths are narrow strips of wood nailed to battens that provide a key for the plaster to attach to. Load-bearing walls had plaster applied directly to the brick or rock in a series of coats.
Plasterboard became pop in the post-War catamenia. Information technology is sometimes skimmed with a couple of coats of plaster to give a uniform end, or only stock-still in place and the joints taped and filled (known every bit dry-lining).
Equipment List
Tools
- Stanley-type knife
- Bucket for mixing plaster
- Smaller plastic pot or tray for mixing filler
- Small filler 'pocketknife
- Plastering float
- Hawk
- Hammer
- Chisel
Materials
- Plaster
- Powder-based filler
- Masking tape
- Builders' 'instant take hold of' -blazon adhesive
- Plasterboard offcuts
- Screws
- PVA
Repairing Cracks
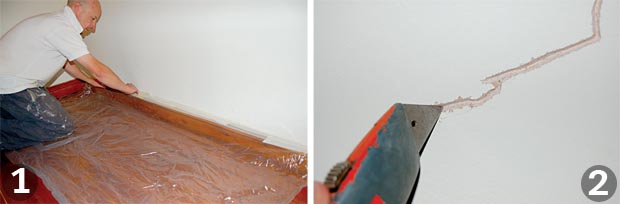
1. Earlier yous kickoff on any of the jobs below, put downwards a dust sheet.
2. Dig out cracks in plaster with a Stanley-blazon knife. You'll demand to cut in until you tin can no longer run across the original crack. Past using the blade like this you lot terminate upwards with a V-shaped groove which is platonic for taking the filler.
3. When yous have dug the cracks out, vacuum out any dust and debris and then the groove is clean.
iv. For vertical and overhead filling jobs (i.east. about of them), mix the filler powder with water until it becomes a stiff paste. How strong? We reckon its ready to use when you lot can do this with a filler-pocketknife total and the filler doesn't autumn to the floor.

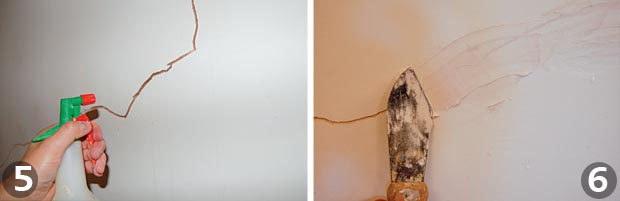
five. Lightly dampen the area to exist filled with a plant sprayer. This helps the filler to stick.
half-dozen. Spread the filler into the groove making sure that it has gone correct to the bottom. Leave the filler a little proud over the groove but remove the excess either side before the filler dries. Once dry, rub the expanse downwardly with medium-grade sandpaper, and then fine-grade earlier decorating.
How to Patch Plaster with Corner Damage
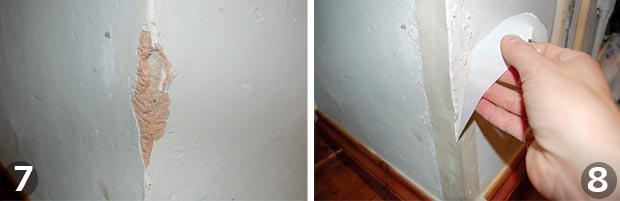
7. Harm like this is pretty common. Merely applying filler and hoping for the best rarely works because gravity just drags the filler downwardly. Repaired corners are also vulnerable to people walking by and knocking them. To gear up a corner like this, first mix up your filler as in step four, then…
viii. Use the filler to the corner and become the shape roughly correct. And so put some wide masking tape over both sides of the corner and go out the filler to dry. The tape protects the filler and keeps information technology in shape. A light sanding after volition deliver the perfect corner repair. Larger areas of missing corner can be repaired using a plastering corner bead which is fixed to the wall beneath the level of the existing plaster and and so plastered (rather than filled) up to.
How to Patch Plaster Where Chunks are Missing
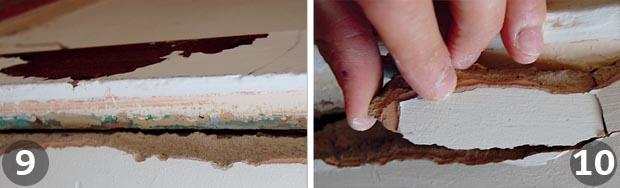
9. Chunks fall out of plaster walls for a number of reasons: household awkwardness is ane contributory factor, but plumbing fixtures or adjusting a door frame (as here) can create a real mess. This sort of damage is all-time repaired with a couple of coats of plaster rather than a hit it and quit filler arroyo.
10. Starting time remove any loose chunks of plaster employ a hammer and chisel if necessary then vacuum out the area to go rid of the dust and debris.
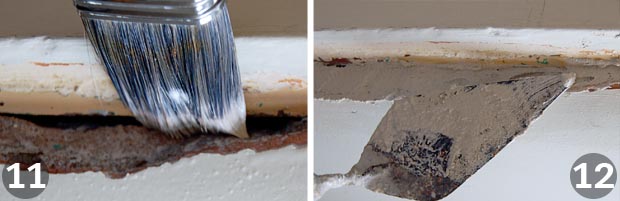
eleven. Brush in a PVA mix to give the plaster the best possible chance of bonding with the existing wall.
12. Mix up plaster co-ordinate to the manufacturer's instructions. Information technology should be smooth, lump gratuitous and not too runny. Next, apply a thin coat of plaster (2-3mm) onto the expanse to be repaired. Don't endeavor to make full the whole matter at once or the plaster will just dribble out of the repair.
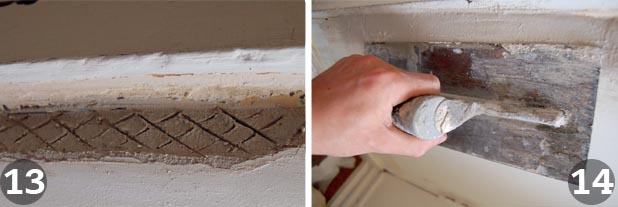
13. When the plaster starts to dry, lightly scratch the surface with the end of the trowel in this blueprint.
xiv. Once the first coat is dry, mix up plaster as earlier and use a plastering float to apply. Once the shape is correct, go out the job alone for 10 minutes so moisture the float and smoothen the surface over
How to Patch Holes in Plasterboard
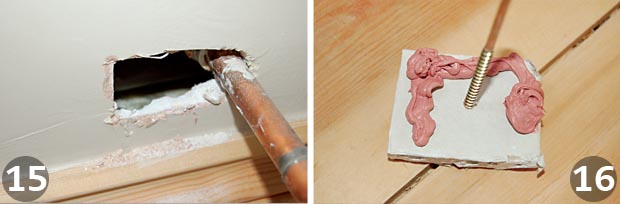
15. Holes like these are awkward to fix because at that place's frequently a void behind the board so any filler you lot put in just disappears. This hole came nigh when a plumber couldn't determine where to feed the pipes for a radiator. Just fixing holes in plasterboard tin can be achieved easily…
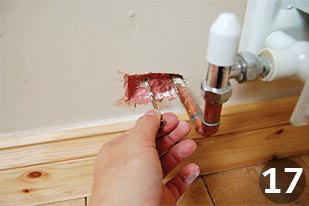
16. Cut a piece of plasterboard that is the same width but around 25mm longer than the pigsty. Clasp on some 'instant take hold of' around the edge of the lath and and so current of air in a long screw to the centre of the repair piece.
17. Jiggle the plasterboard repair piece into the pigsty and hold it in place for a few seconds to requite the adhesive time to 'grab'. In one case the agglutinative has stale, fully apply filler on top of the plasterboard insert to bring the repair affluent.

How To Repair Wall Plaster,
Source: https://www.homebuilding.co.uk/advice/how-to-patch-plaster
Posted by: johnsonshaterecer.blogspot.com
0 Response to "How To Repair Wall Plaster"
Post a Comment